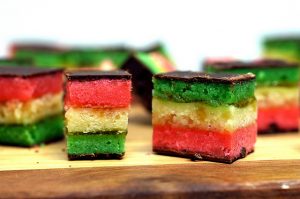
 In my family, at any family gathering, rainbow cookies are always on the dessert table. If not familiar, I describe it as a “cake-like cookie.” Chocolate is applied as a cookie top and bottom, and the middle is filled with a 3-layer sponge-cake, made with almond paste, and connected with a fruity jam… It’s commonly believed that the rainbow cookie originated among Italian immigrants in America (my homies).
Rainbow cookies are traditionally made with white-flour, but this delicious recipe, by Nicole Hunn, is made gluten-free! I love it because it maintains the integrity and tastes just like the original recipe (I guarantee if served along side the original, no one would notice the difference)!
While this is still a treat/dessert and should be eaten in moderation, it is a healthier swap from the original and really fun to make! My favorite part of a rainbow cookie is how it brightens any table… Change the food coloring to make the cookies match any theme to any party. These are easy to grab and eat, without a mess, and always a hit!
INGREDIENTS
COOKIES & FILLING:
- 8 ounces almond paste (Love ‘n’ Bake brand and Solo brand are both gluten free, or you can use this homemade marzipan), broken up with a fork
- 16 tablespoons (224 g) unsalted butter, melted and cooled
- 3/4 cup (150 g) sugar
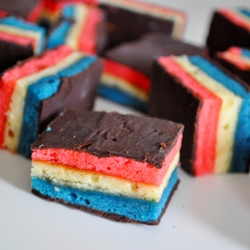
Balanced Beauty Tip: Mix up Food Coloring for Holidays or themed-parties… Like Red, White & Blue for 4th of July!
- 4 eggs (240 g, weighed out of shell) at room temperature, beaten
- 2 cups (280 g) all purpose gluten free flour (I used Better Batter)
- 1/4 teaspoon kosher salt
- Red liquid food coloring (8 to 10 drops)
- Green liquid food coloring (8 to 10 drops)
- Yellow liquid food coloring (8 to 10 drops)
- 1/2 cup (160 g) seedless raspberry or strawberry jam
CHOCOLATE TOPPING:
- 6 ounces semi-sweet chocolate, chopped
- 2 tablespoons unsalted butter
- 1/3 cup (2 2/3 fluid ounces) heavy cream
DIRECTIONS
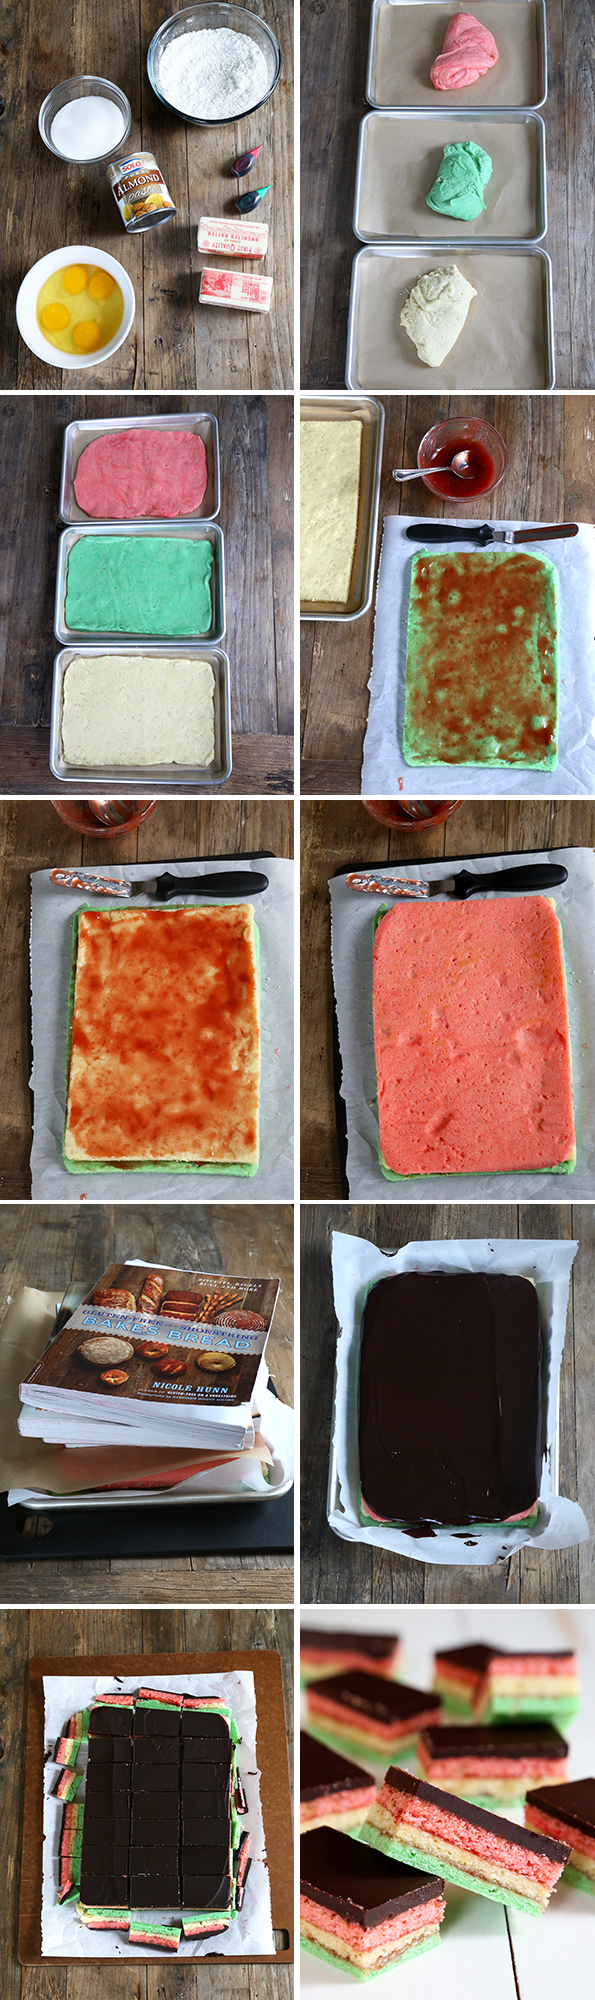
- Preheat your oven to 350°F. Line 3 quarter sheet pans (each 9-inches x 12-inches) with unbleached parchment paper, and set them aside.
- Make the cookie dough. In the bowl of a stand mixer fitted with the paddle attachment (or a large bowl with a hand mixer), cream the almond paste and butter until well-combined. There may be some remaining small clumps in the almond paste, which is fine. Add the sugar and eggs, beating to combine well after each addition. The batter should be thick. Add the flour, and kosher salt, and mix until the dough comes together and is smooth. Divide the dough into three equal parts (each about 500 grams). Add the green food coloring to one part, and mix to combine. Add the red food coloring to another part, and mix to combine. Add the yellow food coloring to one part, and mix to combine, Divide the 3 parts of dough among the three prepared pans. Stretch and press the dough into an even layer in each pan, using wet fingers and a wet spatula. The dough will be sticky.
- Bake and assemble the layers. Place each pan, one at a time, in the center of the preheated oven and bake for 10 minutes, or until the dough just begins to brown around the edges. Allow the layers to cool slightly in the pans. Carefully place the green layer on a piece of parchment paper, spread evenly with one half of the jam. Place the plain layer carefully on top, taking care not to handle the cakes too much or they may begin to crack. Spread the remaining jam on top of the plain layer, and top with the pink layer. Place a sheet of parchment paper on top, and place a few books on top of the stack to compress the layers. Place the stack of cakes in the refrigerator for about 30 minutes, or until the layers have begun to flatten and compress.
- Once the cookies are chilled, make the chocolate topping. Place the chopped chocolate in a medium-size heat safe bowl. In a small saucepan, heat the cream and butter over medium-low heat, stirring frequently, until the butter is melted and the cream is just beginning to simmer. Pour the hot cream and butter mixture over the chocolate, mixing to combine. The chocolate should be smooth and shiny. Pour the melted chocolate over the top of the chilled cookies, and spread into an even layer with an offset spatula or knife. Chill once more in the refrigerator until the chocolate topping is set (about 20 minutes). Using a large serrated knife, trim all of the edges and then slice into about 21 even rectangles. Serve immediately or wrap tightly and store in the freezer until ready to serve.
There you have it-
My favorite gluten-free recipe, for one of my favorite family desserts!
A 7-layer slice of chocolate, cake, and jam… So decadent and rich, just 1 small cookie is a perfect portioned bite to feel totally satisfied.
MANGIA & ENJOY!!!